Cloud AI Agent
Configure AI Agents
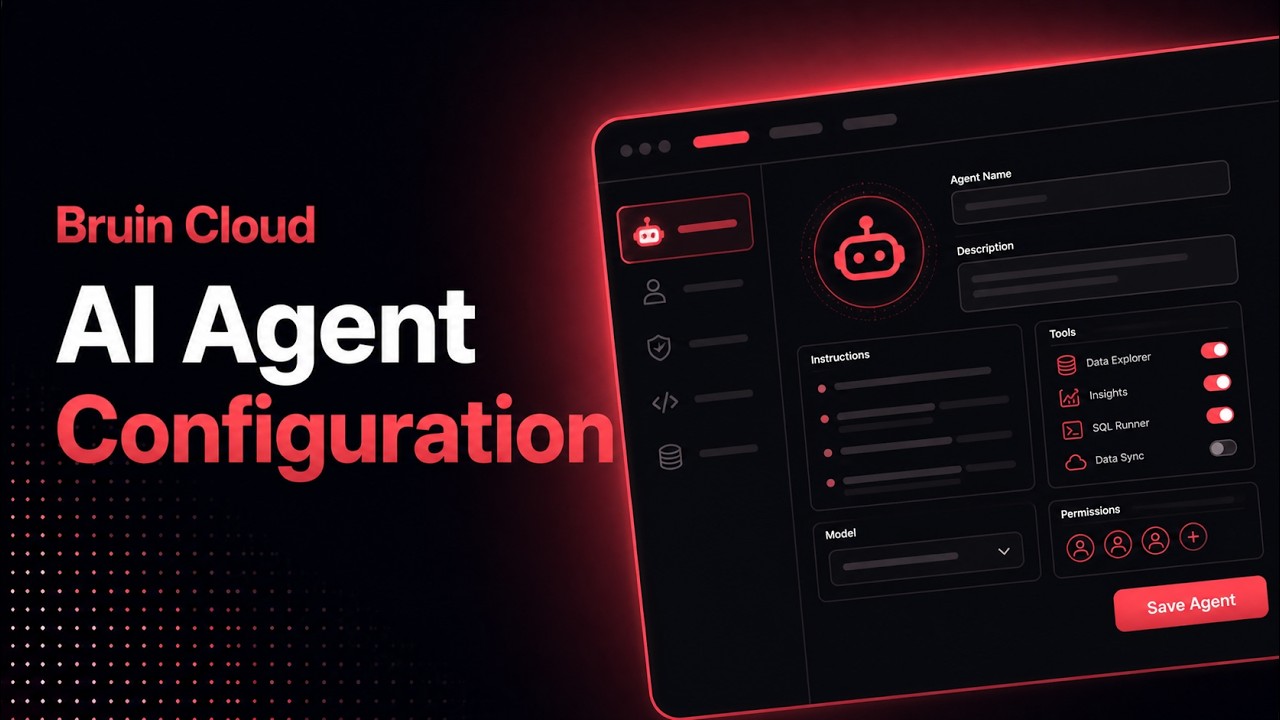
Create and configure AI agents in Bruin Cloud - pick a project, add messaging integrations, attach a connection set, and set permissions.
- 1Configure AI Agents6 min
Configure the agent
1) Open the agents page
From the AI menu, go to Agents. You'll see the list of existing agents and a button to create a new one.
2) Pick a project
The first step is selecting the project the agent should connect to.
- Pick a project - the agent gets access to that project's repo and pipelines.
- No project - the agent has no access to your repos or projects. It behaves like a regular ChatGPT or Claude chat.
3) Name the agent
Give the agent a clear name. This is how it shows up in the agents list and in any messaging integrations.
4) Add messaging integrations
You can integrate the agent into messaging platforms like Slack, Discord, Teams, and WhatsApp.
- For Slack and Discord, set up the integration once from the Integrations menu. After that, when you create an agent you can pick the integration and enter the channel ID.
- For other platforms, you generate a code in Bruin Cloud and follow the on-screen instructions to wire it up.
If you don't pick an integration, the agent is still usable - it lives inside the Bruin Cloud web chat, the dashboard builder, and as a scheduled agent.
5) Attach a connection set
Under Connections, pick the connection set the agent should use.
A connection set is a named bundle of connections to data platforms, kept separate from the connections your pipelines use. This separation lets you:
- Restrict agents to only the data they need.
- Give agents read-only access where pipelines have read/write.
- Apply granular, agent-specific permissions without touching pipeline credentials.
You create connection sets from Connections settings - click New connection set, name it, and pick the data platform connections it should include.
If you create an agent with no connection set, it can still answer general questions and help with non-data tasks, but it won't be able to read your data. It behaves more like a regular ChatGPT or Claude.
6) Optional - Cloud CLI access
You can also give the agent access to the Bruin Cloud CLI. With this enabled, the agent can:
- Run pipelines and assets
- Read logs and run history
- Query the data catalog and glossary
7) Optional - System prompt
Add a system prompt to give the agent specific instructions, role, or constraints. This is useful when you want the agent to focus on a particular workflow or follow a specific tone.
8) Create the agent
Click Create. The agent is now available in the agents list.
9) Reconfigure later
Open an agent from the agents list to change its settings at any time:
- Add or remove integrations
- Swap the connection set
- Edit the system prompt
- Manage access - control which teams and members in your organization can use the agent
More guides
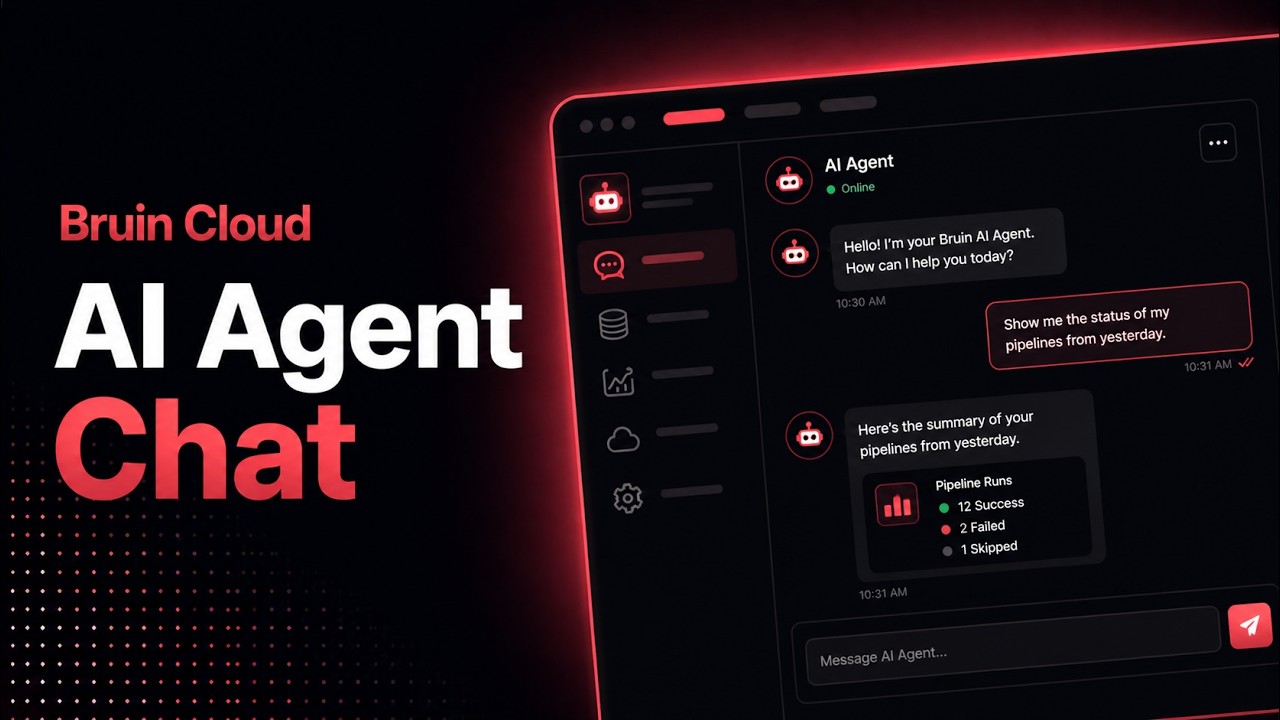
Chat with an AI Agent
Use Bruin Cloud's chat to ask an AI agent about your data, generate reports, and run Bruin Cloud CLI tasks like pipeline status and history.
Configure AI Agents
Create and configure AI agents in Bruin Cloud - pick a project, add messaging integrations, attach a connection set, and set permissions.
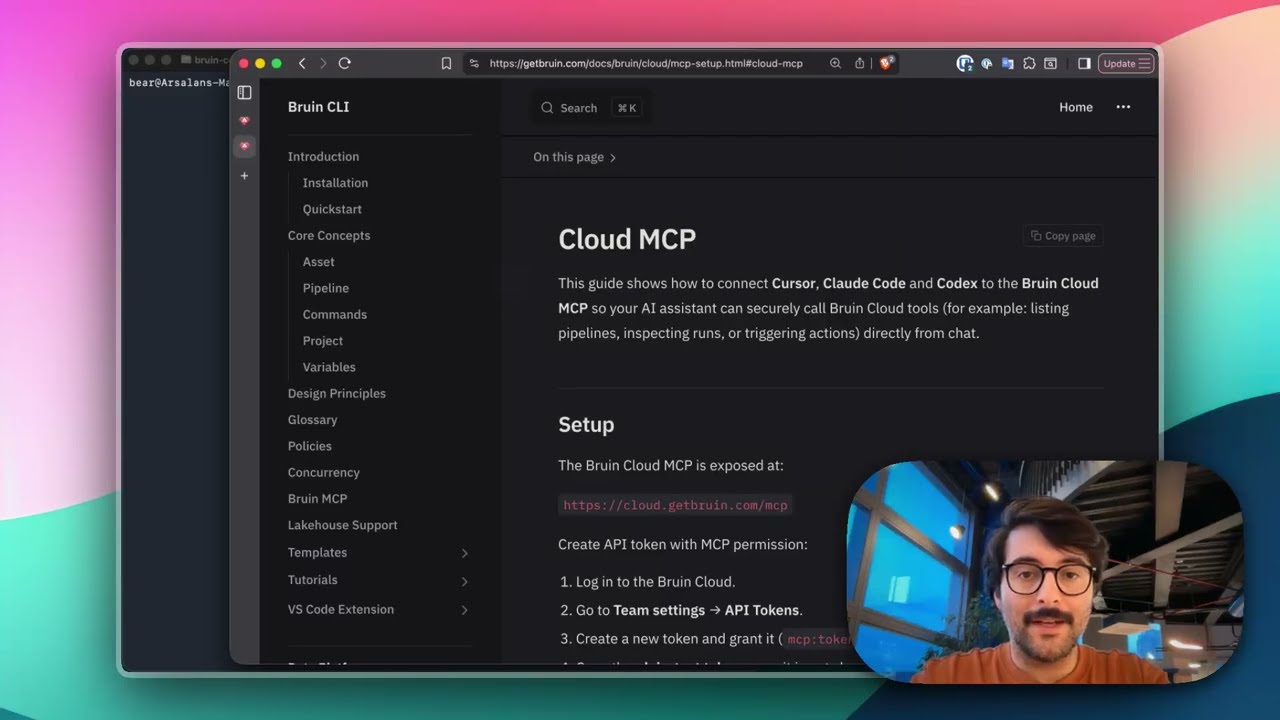
Connect Bruin Cloud MCP to Claude Code
Set up the Bruin Cloud MCP so your AI agent can query pipelines, inspect runs, and trigger actions in Bruin Cloud directly from your terminal.